
How to manage your station's users
In this article, we'll explain how to manage your station's users. Lets begin!
Navigating to users
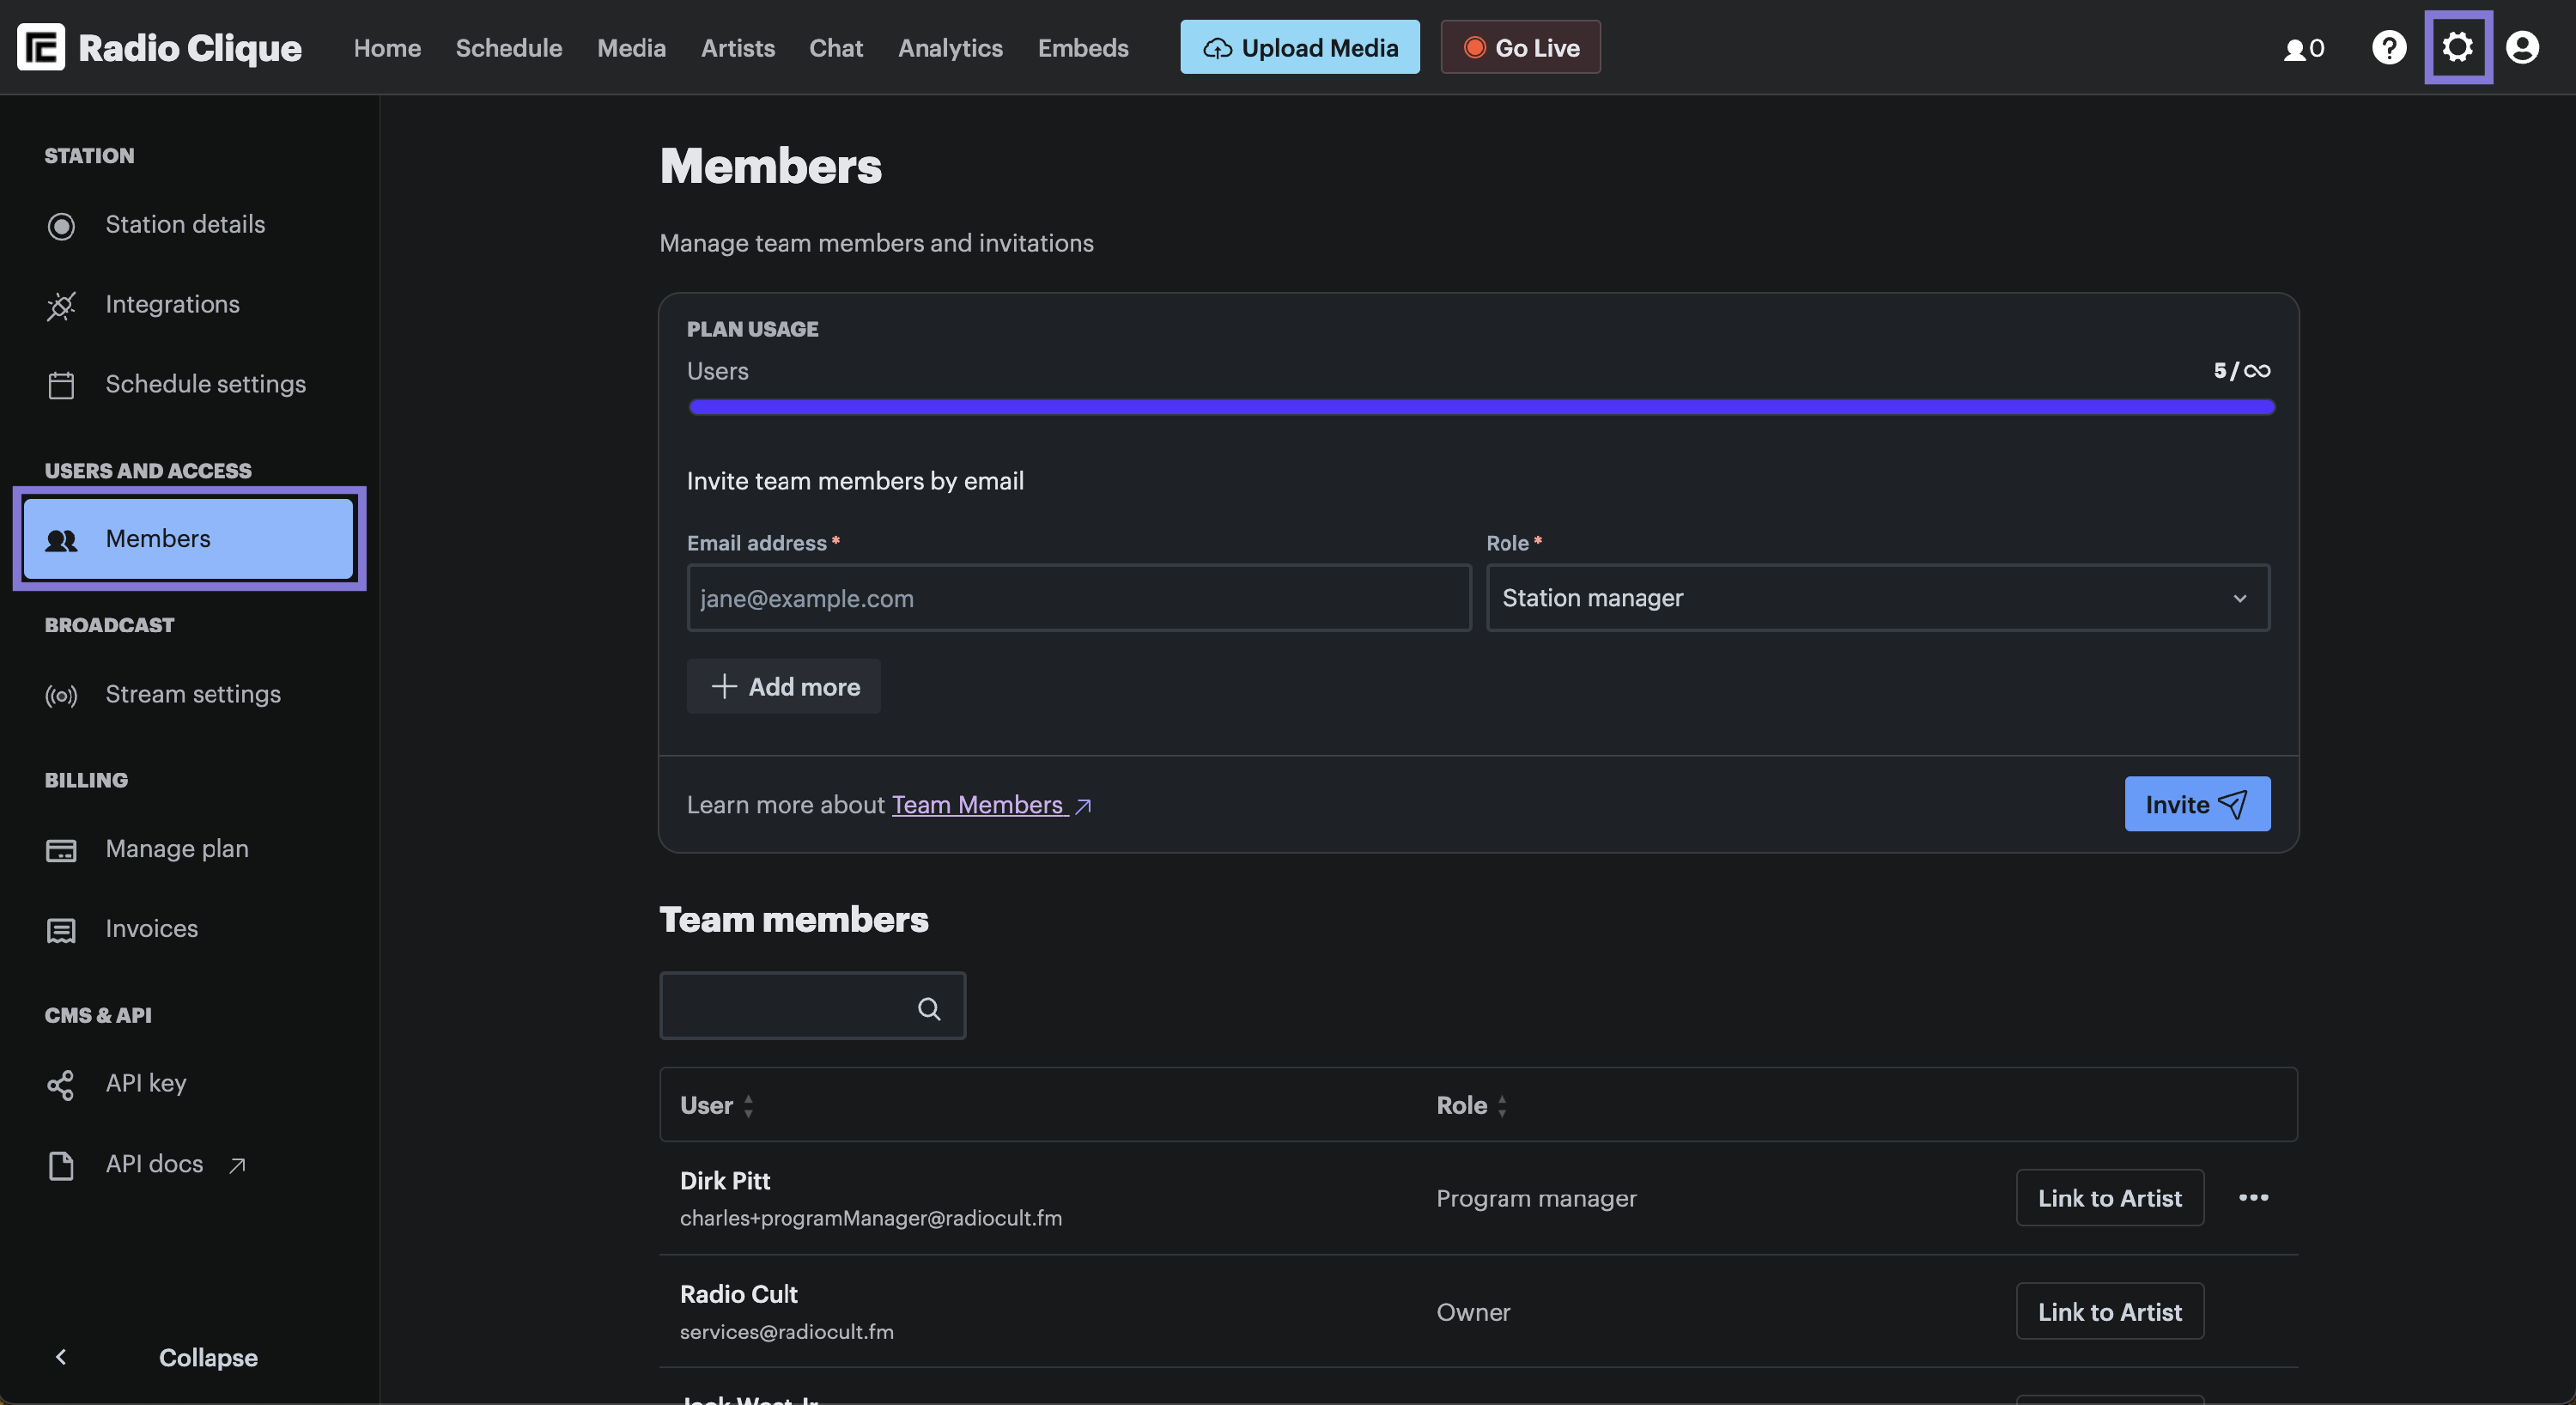
To navigate to the Users page:
- Click the Settings (cog) icon in the top right hand corner of the navigation bar, and
- Then click the Users option under the Users and Access menu, which is contained in the left hand side menu.
Managing your station's users
Your station's users can be managed with the following actions:
- Remove a user: this action will remove the user from Radio Cult and mean they can no longer access or interact with your station on the platform.
- Changing a user's access: this action will change the access level of the user. This means the ability of the user to access certain pages or perform specific actions on the platform will be restricted or granted depending on the new access level selected.
- Linking a user to an artist: linking a user to an artist is useful for users with the DJ role. DJs can only go live during events they are linked to. Unlike Owners, Station managers and Program managers who can go live anytime. Linking a DJ user to an artist allows you to add the linked artist to an event, ensuring that the DJ is only live for the duration of that event.
PLEASE NOTE: The first two actions below can only be performed on users who are NOT the station's Owner.
Removing a user
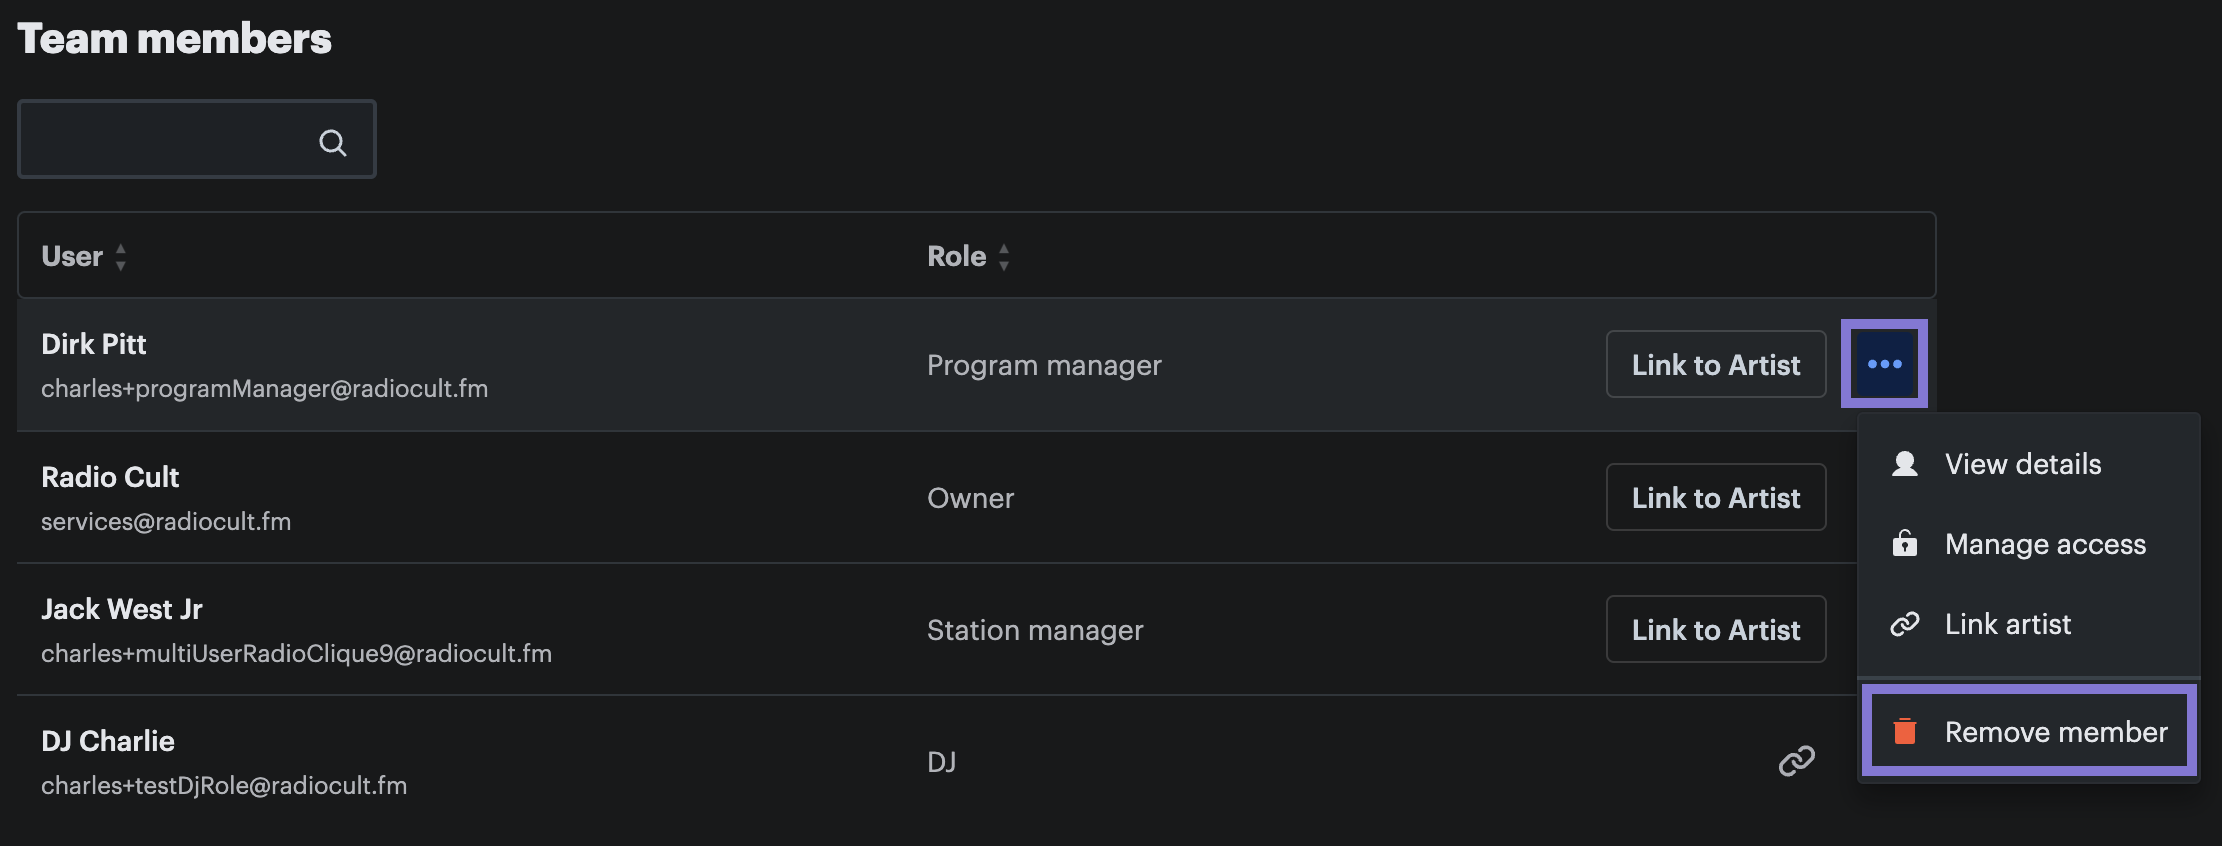
To remove a user from your station, complete the following steps:
- Refer to the Team members table on the Users page and find the particular user you want to remove,
- Highlight the row of that particular user and the Actions (...) button will be displayed on the far right of the table row,
- Click the Actions (...) button and then click the Remove user button. A confirmation window will appear informing you that this action cannot be undone,
- Click the Remove user button displayed in the confirmation window.
The user will now be removed from your station.
Changing a user's access
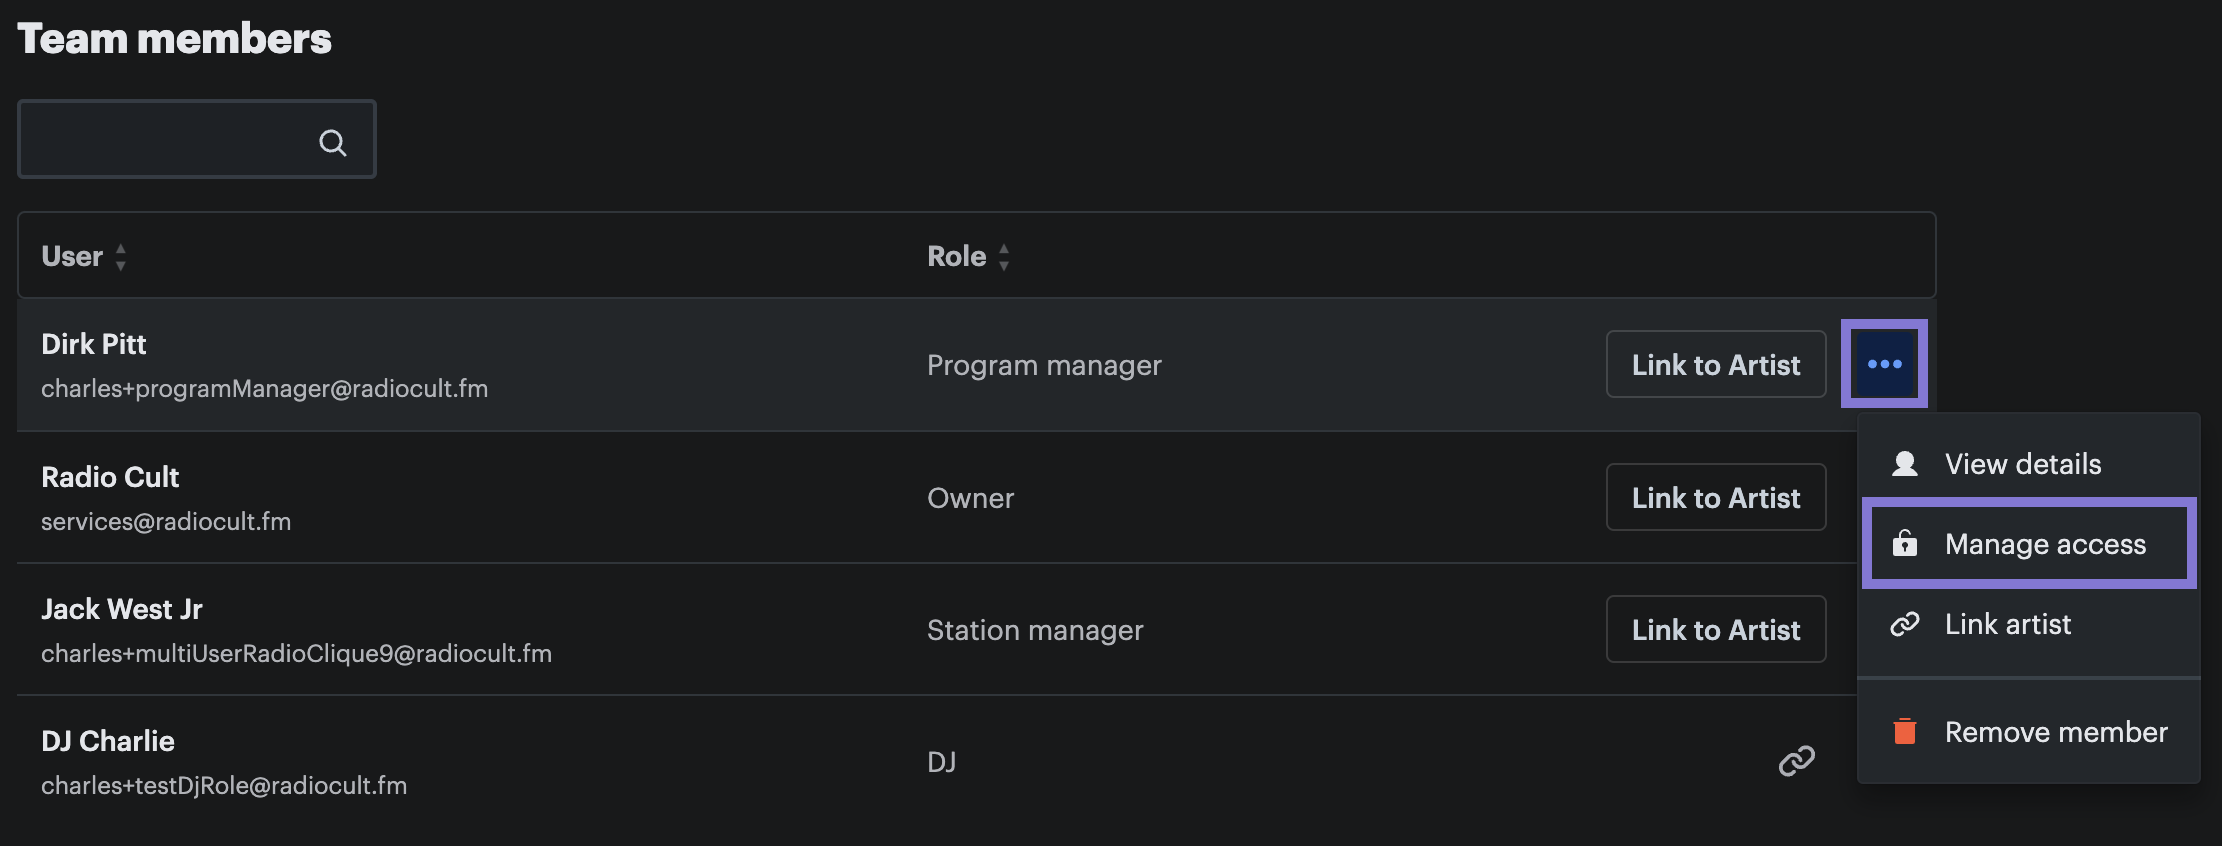
To change a user's access (or role), complete the following steps:
- Refer to the Team members table on the Users page and find the particular user whose access you want to change,
- Highlight the row of that particular user and the Actions (...) button will be displayed on the far right of the table row,
- Click the Actions (...) button and then click the Manage access button. A window will appear displaying the different access levels which can be applied to the user,
- Select the appropriate access level,
- Click the Save changes button.
The user's access will now be changed to the access level you selected.
Linking a user to an artist
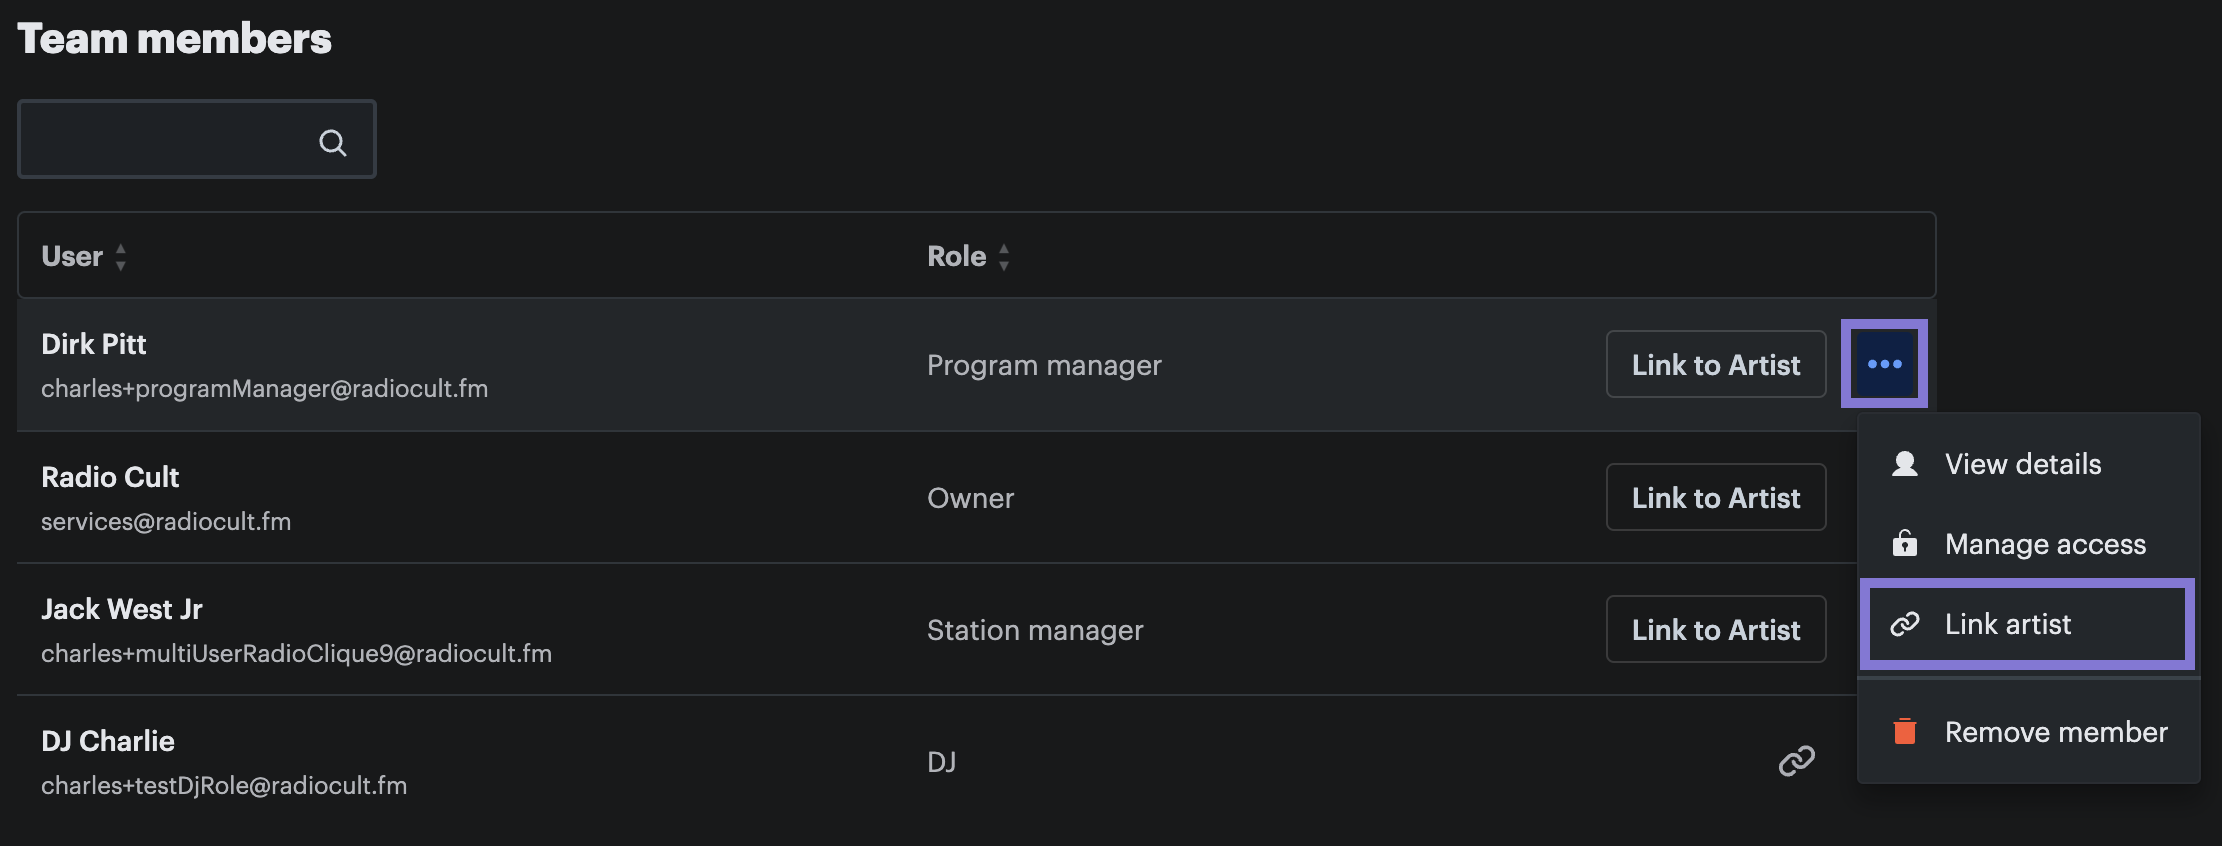
To link a user to an artist, complete the following steps:
- Refer to the Team members table on the Users page and find the particular user who you want to link an artist to,
- Highlight the row of that particular user and the Actions (...) button will be displayed on the far right of the table row,
- Click the Actions (...) button and then click the Link artist button. The link artist window will appear.
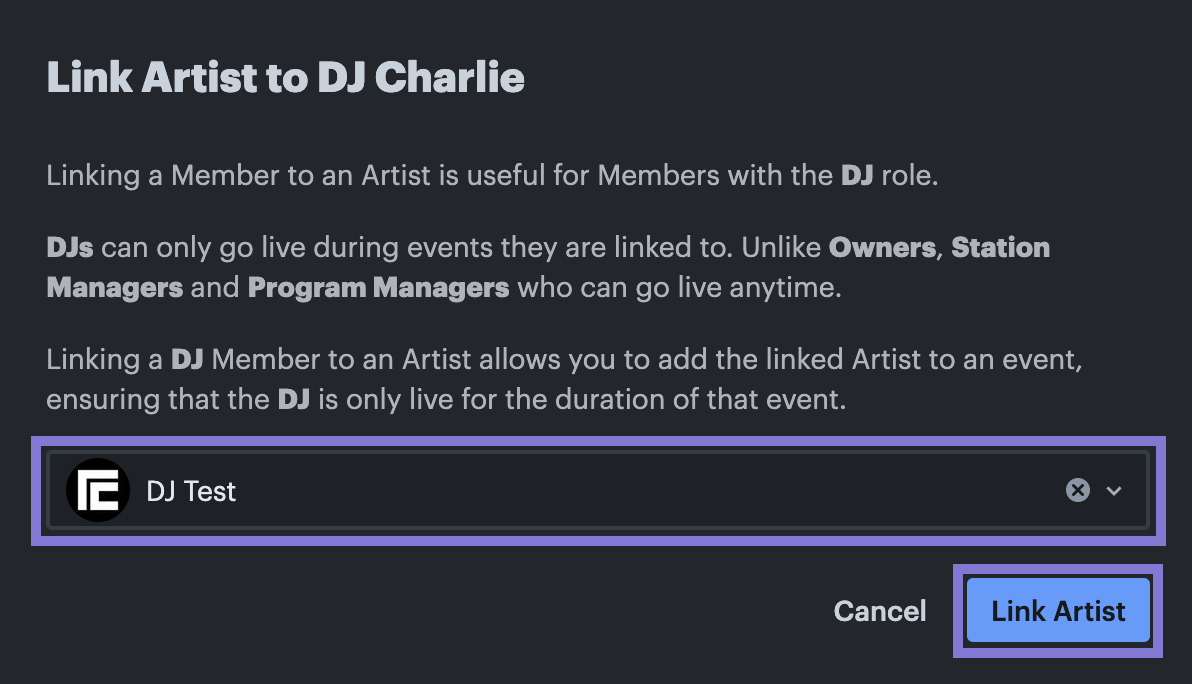
Next complete the following steps:
- Click the select input and chose the artist you want to link to the particular user, and
- Then click the Link Artist button.
The user will now be linked to the selected artist.
PLEASE NOTE: A user may only be linked to one artist and vice versa (i.e. an artist can only be linked to one user).

A user has not been linked to an artist if there is a Link to Artist button displayed to the left of the Actions (...) button (clicking this button is the same as clicking the Link artist button described in step 3 above).
A user has been linked to an artist if there is the Link icon displayed to the left of the Actions (...) button (clicking this button will open the link artist's page in a new tab).