
Configuring your station's schedule
In this article we'll cover the option we provide to configure your schedule in a way that best suits how you operate your station. Let's begin!
Navigating to schedule settings
You can configure your schedule in two separate pages on the platform:
- The Schedule page itself, and
- The Schedule settings page.
Navigating to the schedule page
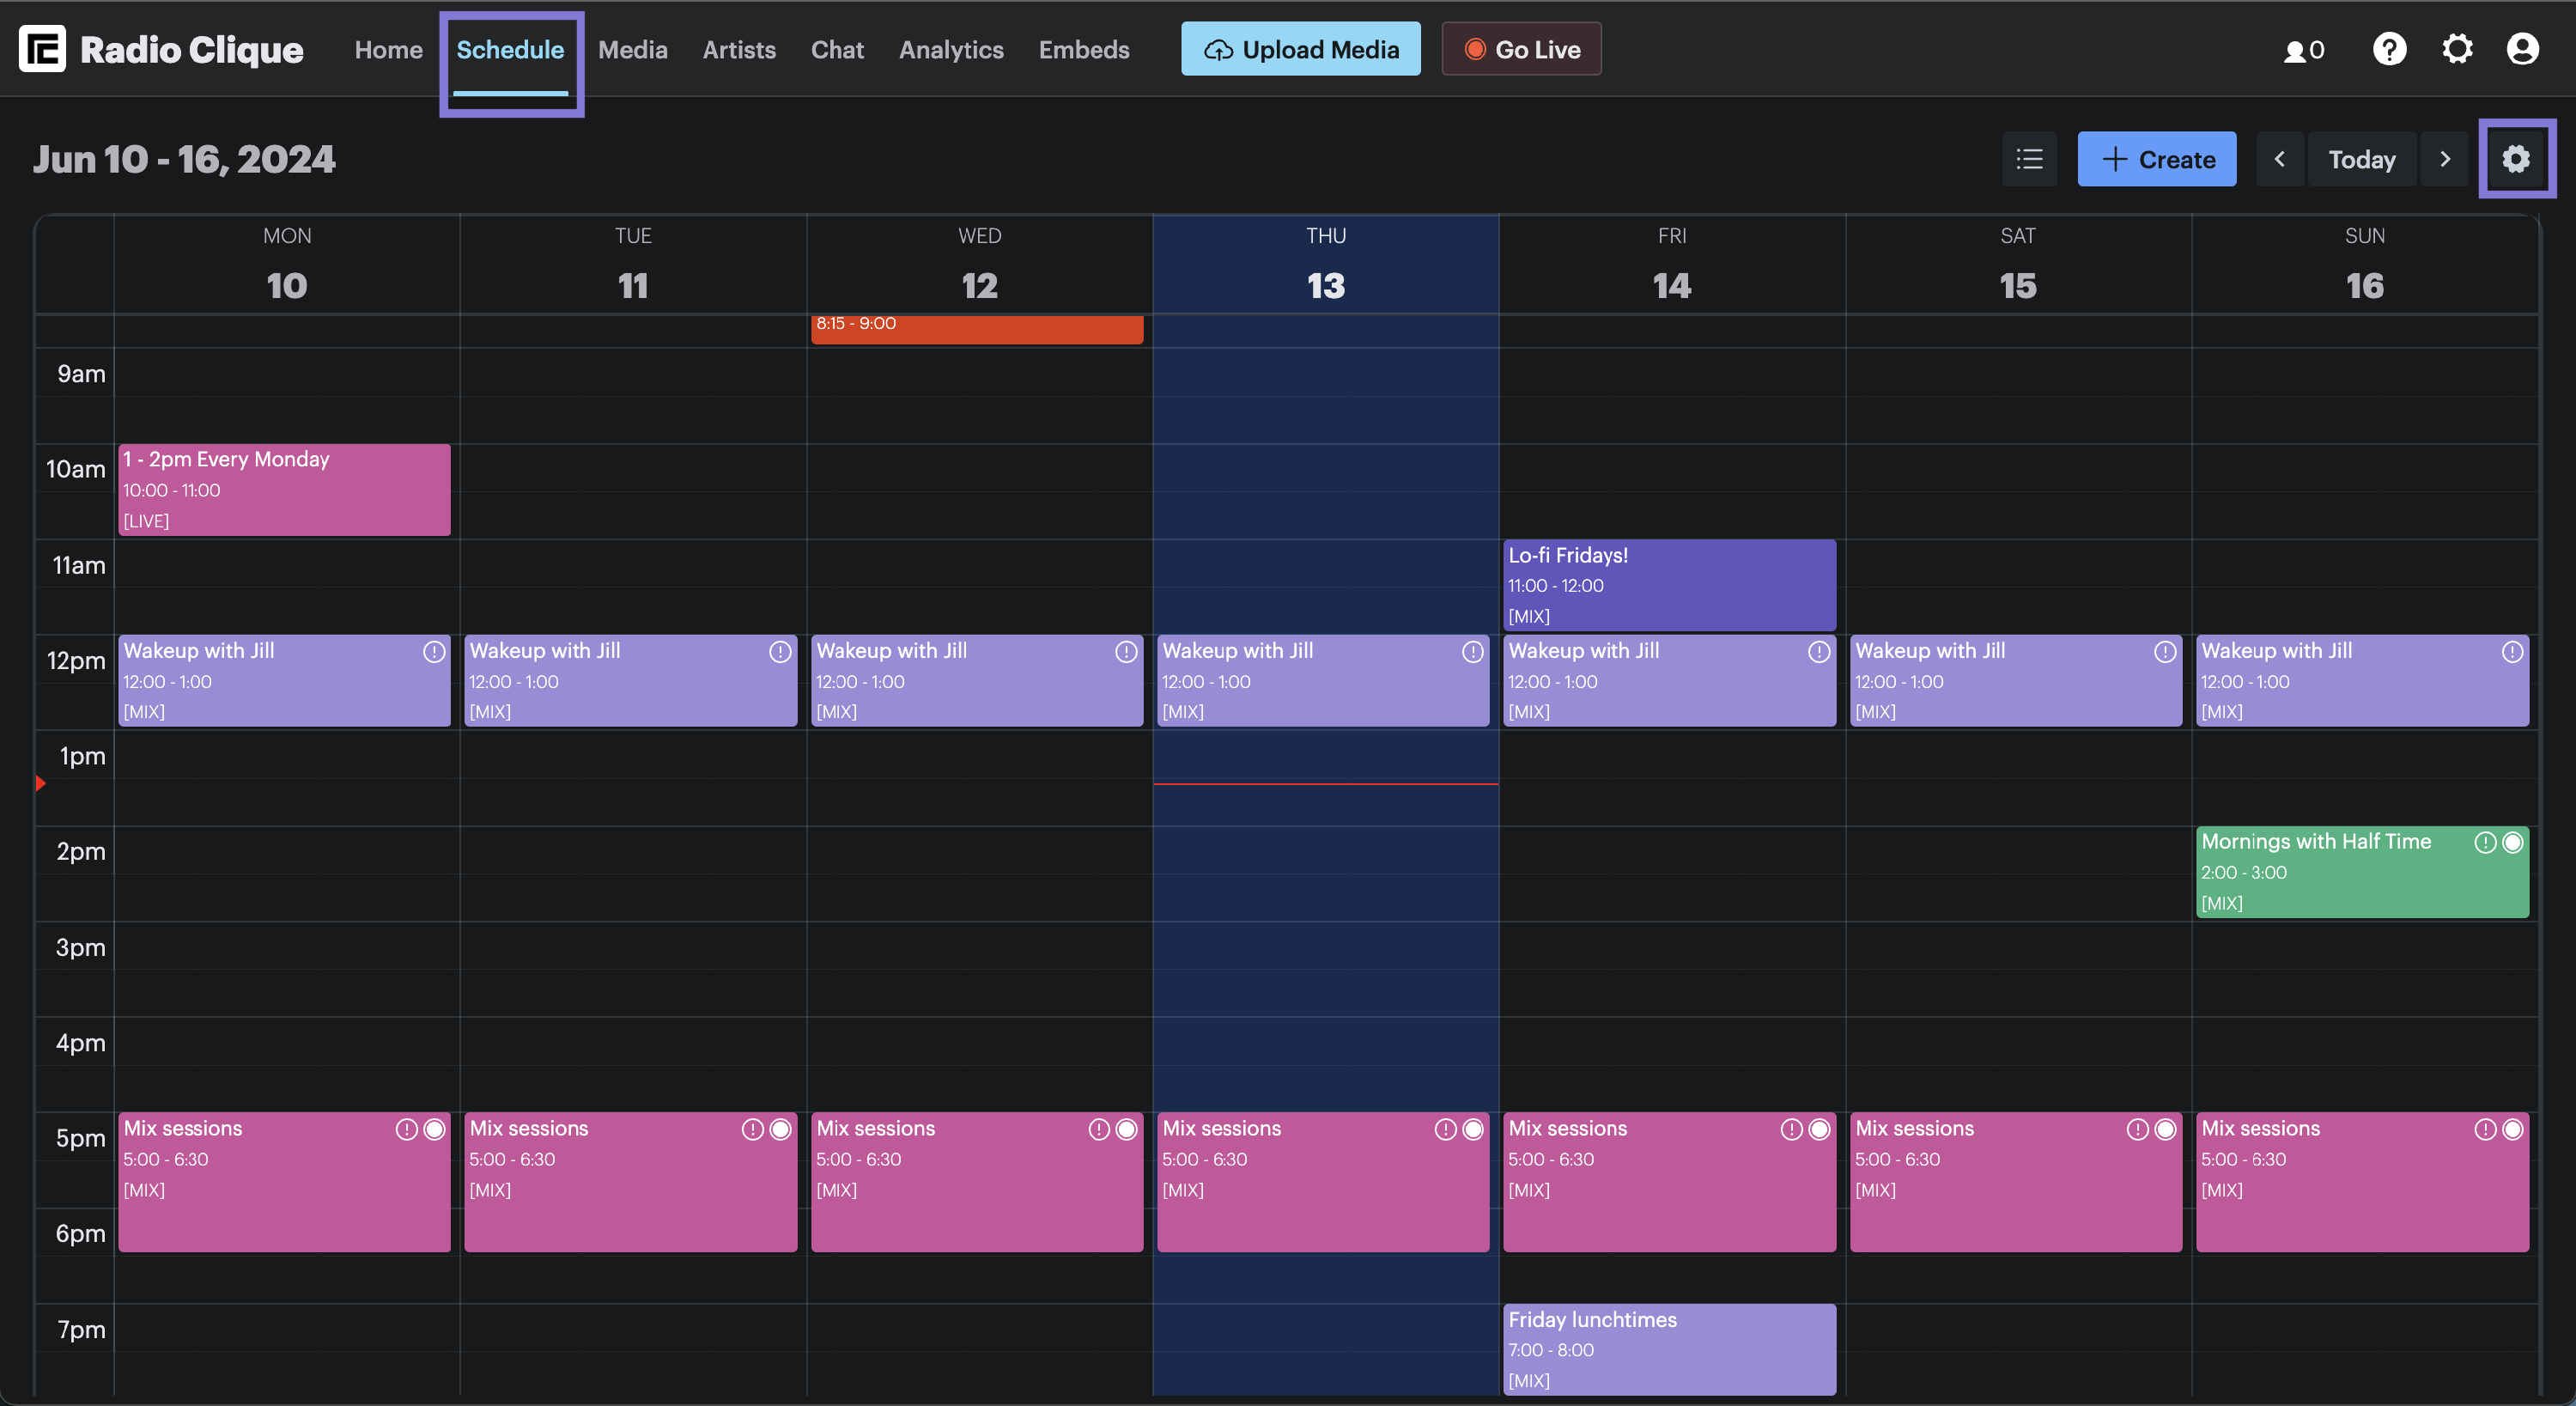
To navigate to the schedule page:
- Click on Schedule in the side navigation.
To access the schedule settings, click the Settings (cog) icon in the top right hand corner of the page header (the button is positioned to the right of the Today button).
Navigating to the schedule settings page
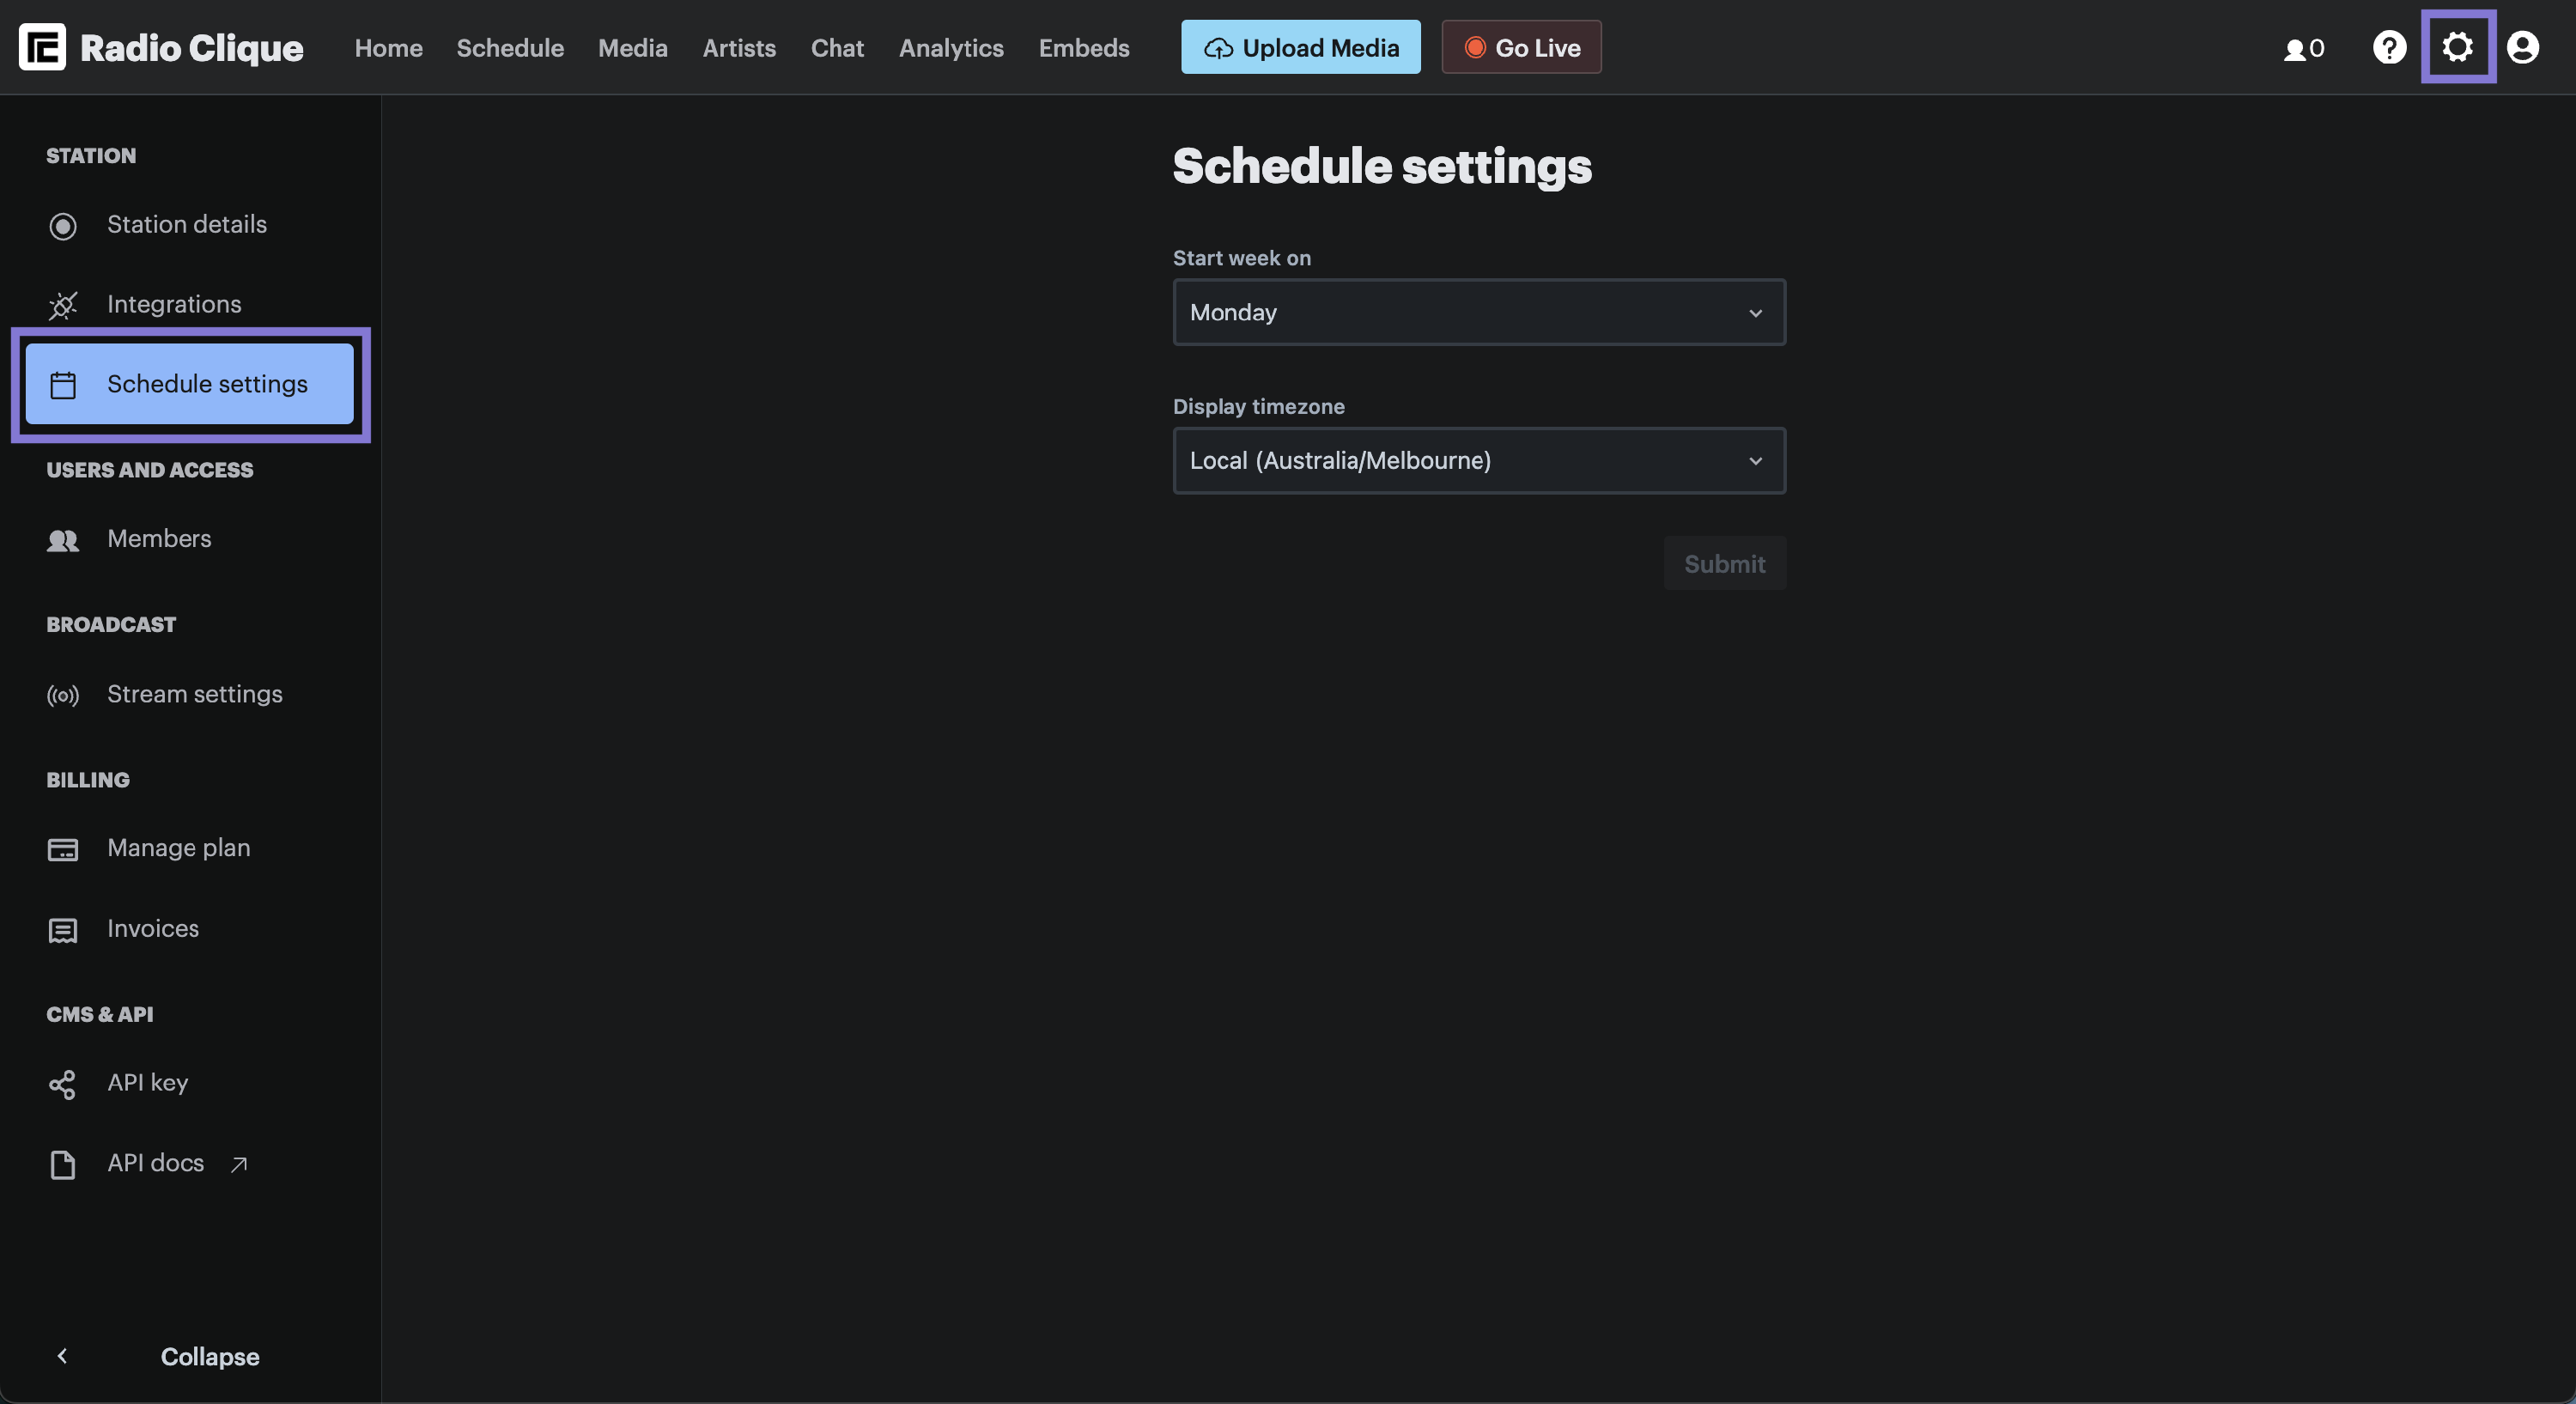
To navigate to the schedule settings page:
- Click the Settings (cog) icon in the top right hand corner of the navigation bar, and
- Then click the Schedule settings option under the Station menu, which is contained in the left hand side menu.
Selecting your station's start week on
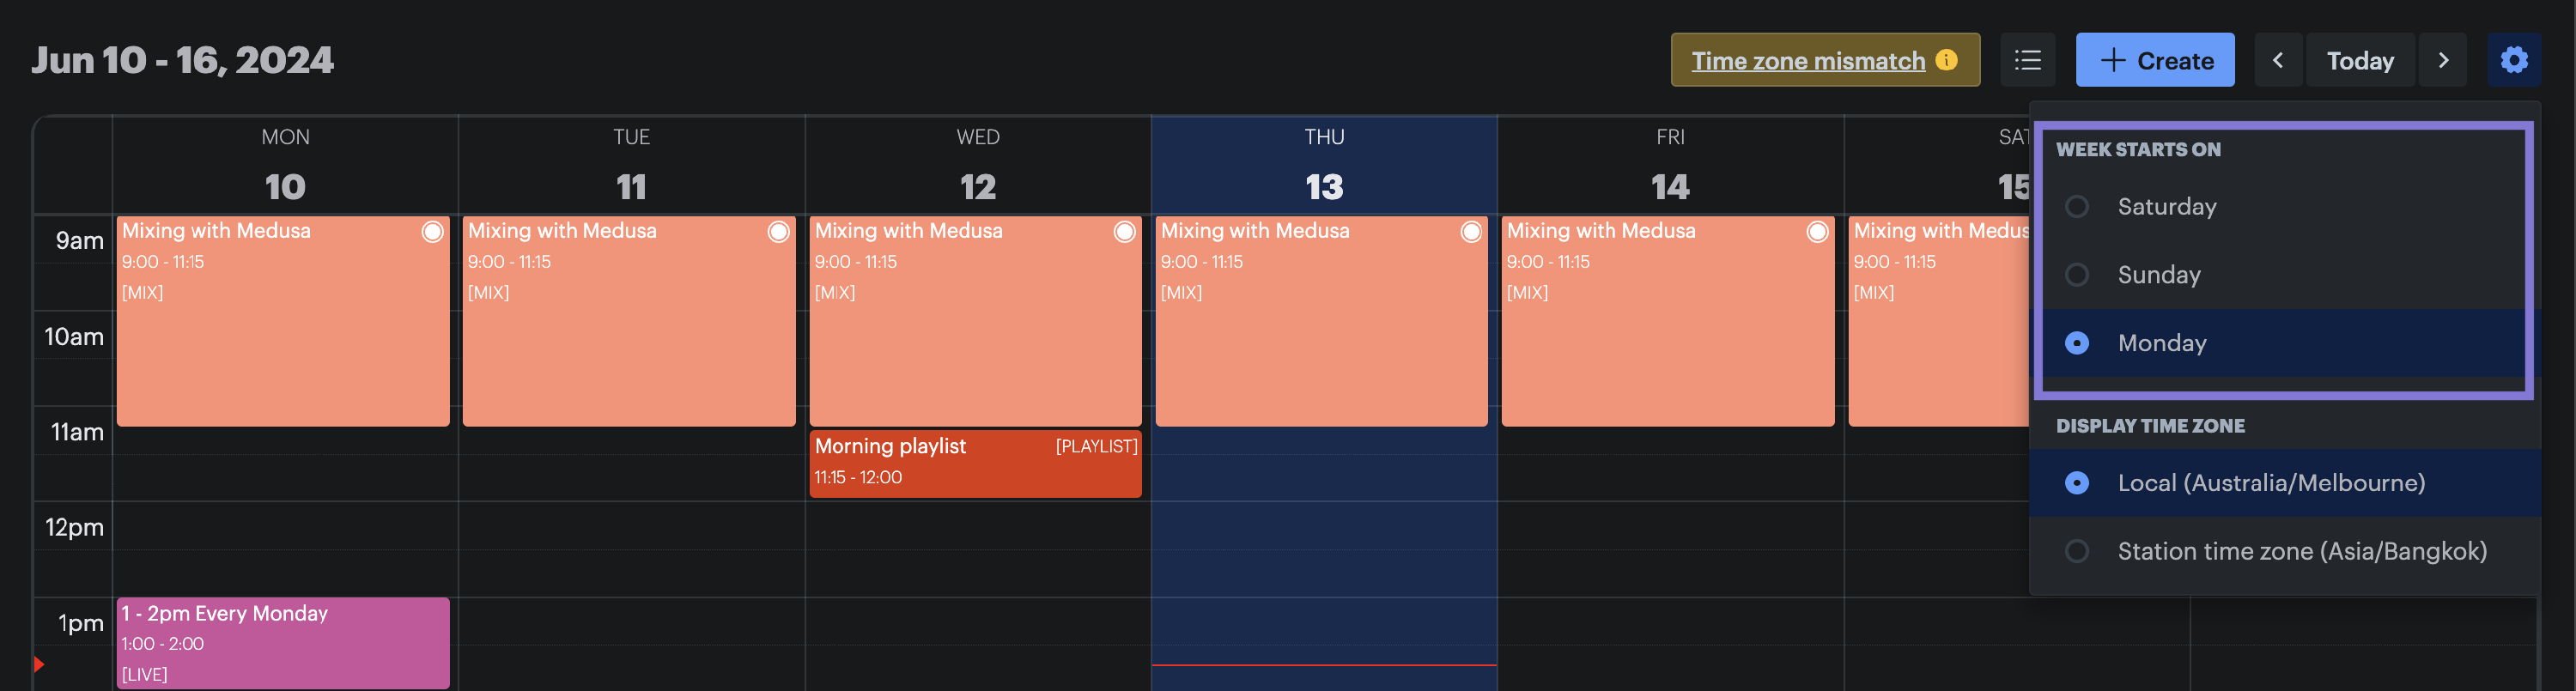
The first setting available to configure is the day the week starts on. This determines the displayed day of the week on which your schedule starts.
The available options are:
- Saturday,
- Sunday, and
- Monday.
For example, if you choose Monday then your schedule calendar will display Monday through Sunday. If you choose Saturday then your calendar will display Sunday through Saturday.
PLEASE NOTE: This setting is simply for display purposes. It has no functional effect beyond how your station's schedule is presented to you on the platform.
Choosing your station's display time zone
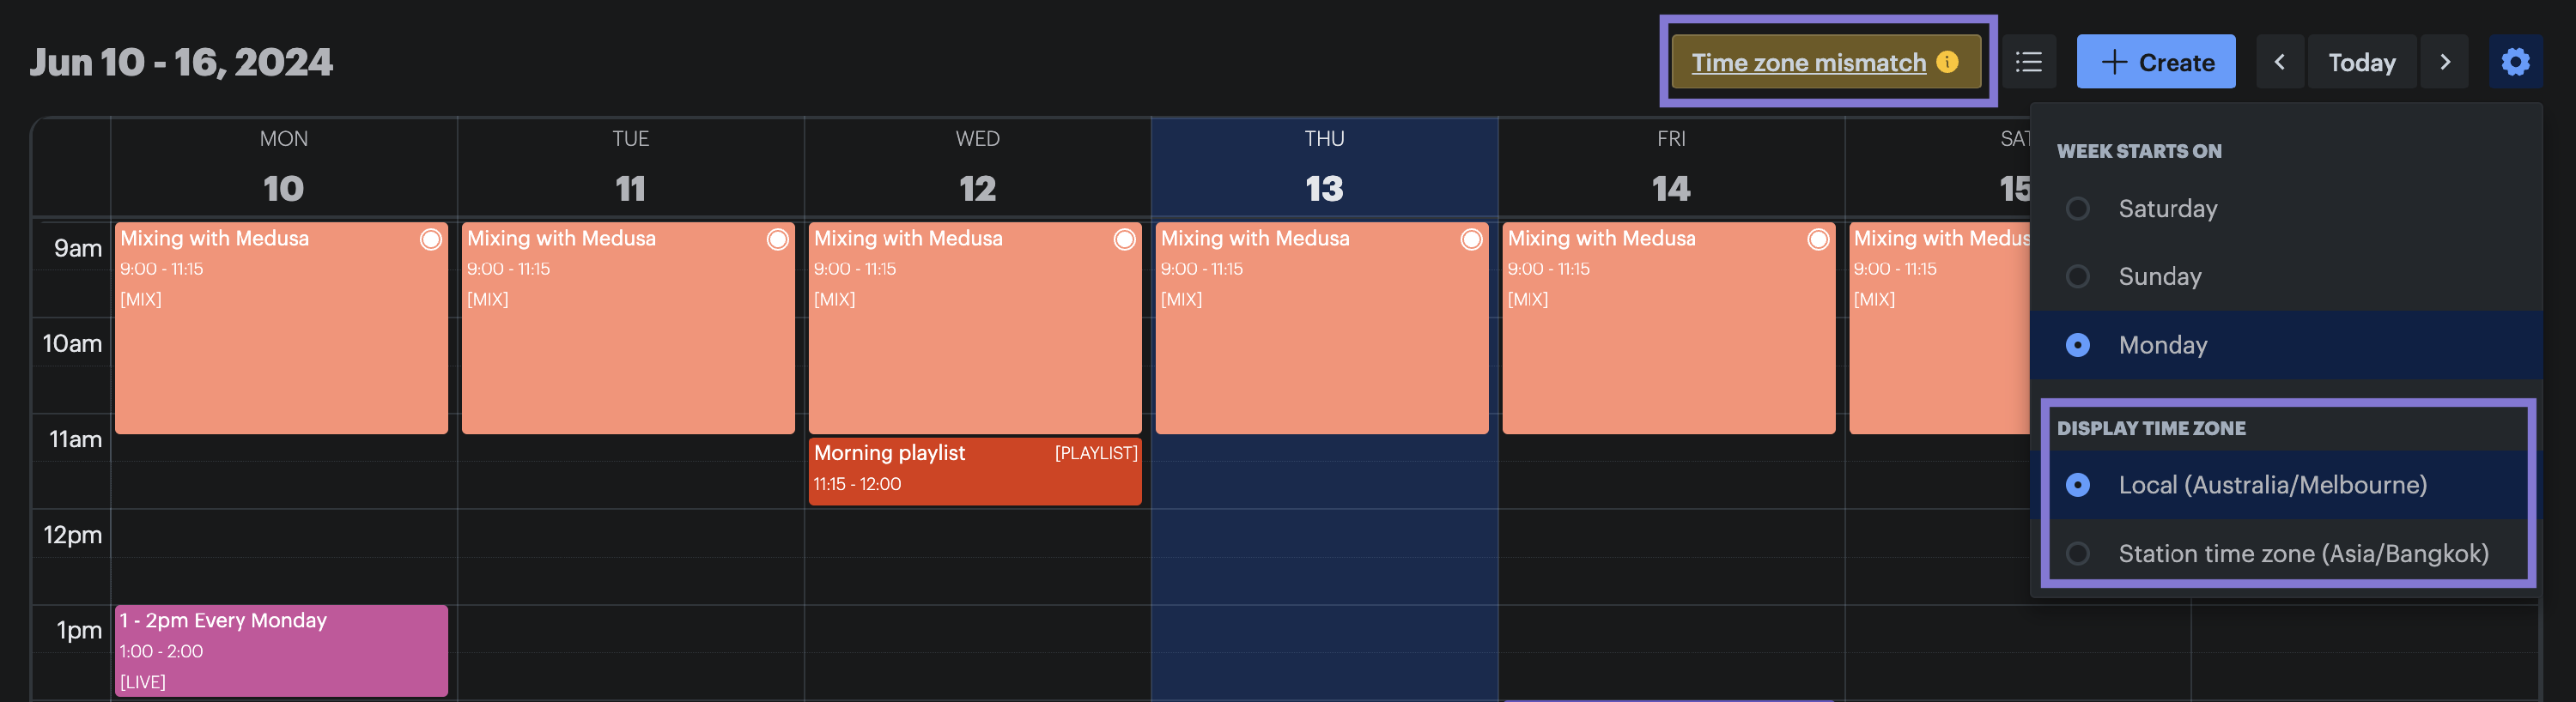
The next setting to configure is choosing your station's display time zone. This setting determines the displayed start and end times of each event on your schedule.
The available options are:
- Local: when this option is selected, all schedule events will be displayed in your local time zone. The specific time zone is determined from the device you are using to access the platform. NOTE: when this option is selected and your local time zone differs from your station's time zone an indicator will be displayed to inform you of this.
- Station time zone: when this option is selected, all schedule events will be displayed in your station's time zone. Your station's time zone is a configurable setting - to learn how to update it refer to this help article.
PLEASE NOTE: This setting is simply for display purposes. It has no functional effect beyond how your station's schedule is presented to you on the platform.